In this video I use layer masks and blending modes in Adobe Photoshop to add a more interesting sky to a landscape photo. I also use Nik Collections Color Efex Pro 4 to add a glamour glow filter that gives the sky a more dreamy look.
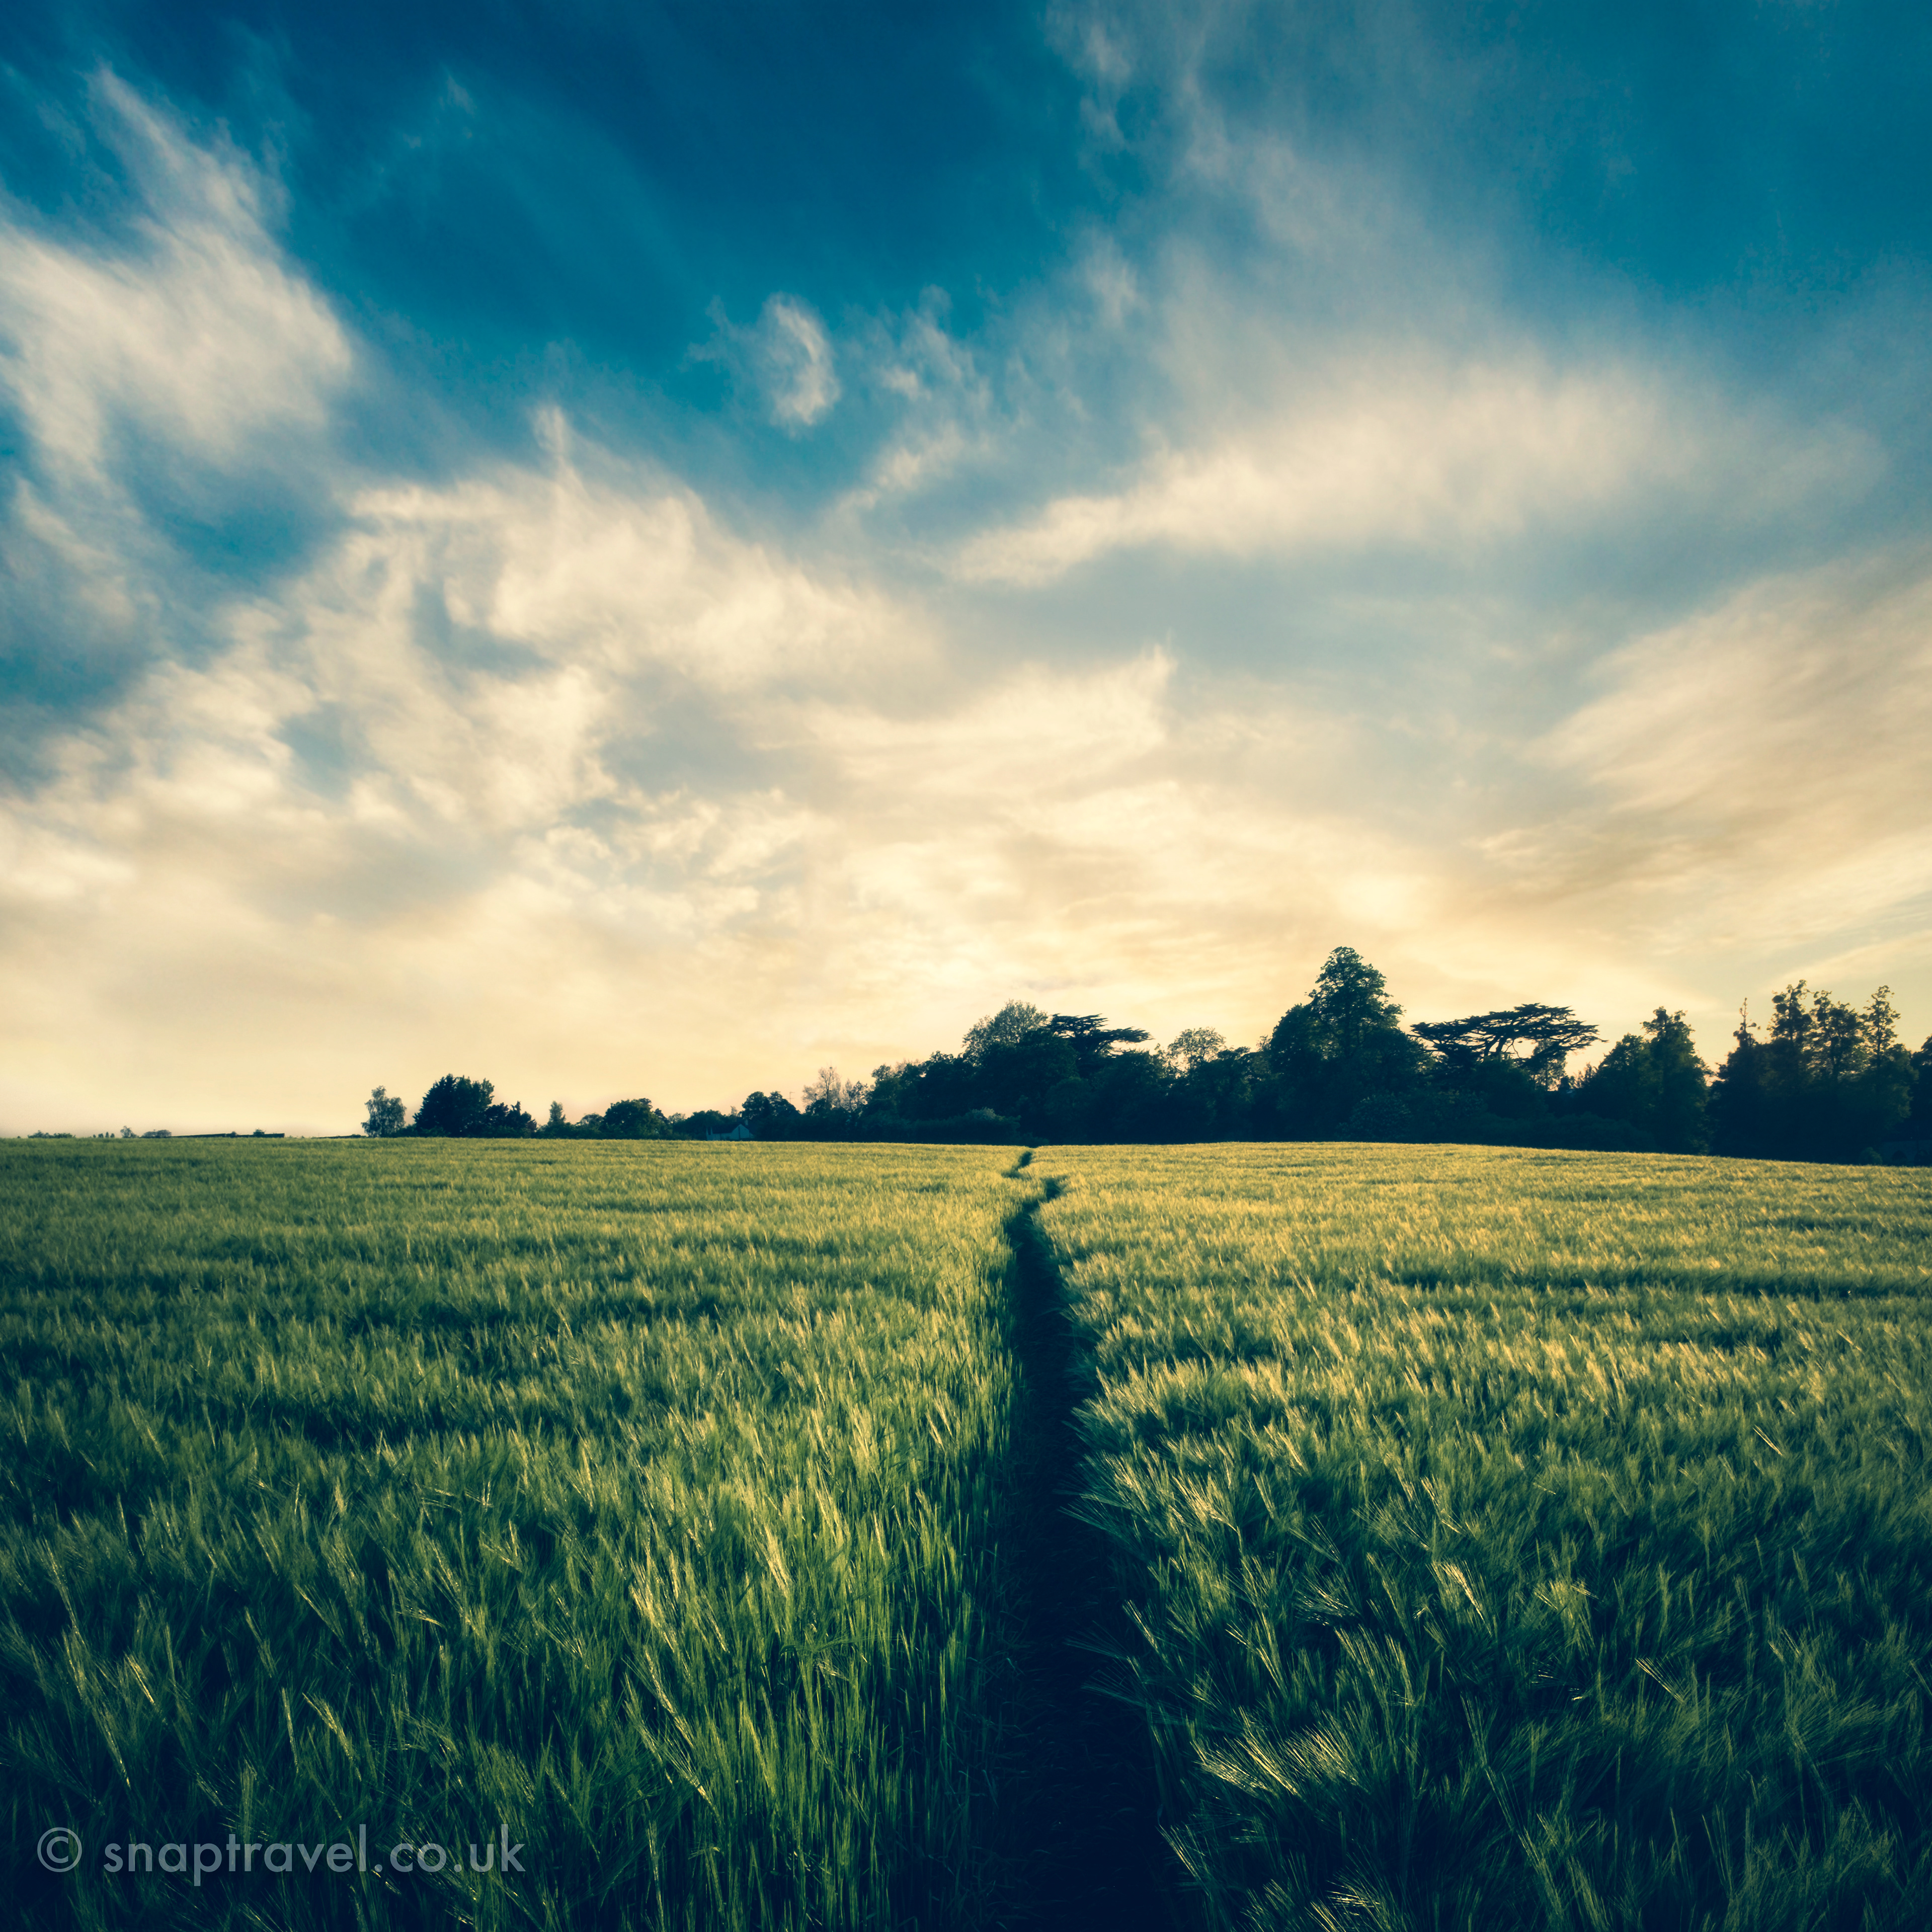
Original photos are available here: Sky, Barley Field
Walk Through
First, unlock the layer by clicking the padlock on the righthand side of the layer thumbnail. Then, go to ‘image-canvas size' and increase the height to 150%. Make sure to click the arrow section at the bottom of the window to indicate the direction you want the canvas to increase, (in this case straight up).
Next, add a layer mask by clicking the 'layer mask' symbol at the bottom of the layer panel. Select the 'brush tool' and make sure your foreground colour is black. Also, be sure the layer mask is selected by clicking on it. Then, paint out as much of the sky as possible.
Then, drag and drop the sky image into the landscape image using the 'move' tool. Use ‘free transform’ by pressing CMD+T (Mac) CTRL+T (Win) to resize and position the sky.
Next, change the blend mode of the sky layer by selecting ‘darken’ from the drop-down menu at the top of the layers panel. This will mean that anything on the layer below that is darker than the sky layer will show through. You’ll see all the darker trees from the bottom layer now show. But, you’ll notice that on the lefthand side of the image the old sky on the bottom layer is also coming through and does not blend well. This is because that old piece of sky on the bottom layer is darker than the new sky.
To fix this, add an adjustment layer to brighten that old sky and make it disappear. Make sure to select the bottom layer, then, from the bottom of the layers panel click the symbol for the adjustment layers and pick ‘curves’. Increase the brightness by pulling up the top of the curves line until that old piece of sky has completely disappeared. You’ll notice this adjustment has increased the brightness of the entire foreground layer, which is not what we want. To fix this, select the layer mask next to the curves adjustment thumbnail and fill the image with black using the ‘paint bucket’ tool. Now, use a white brush to paint the brightness effect back in only where you need it.
Finally, use the keyboard shortcut CMD+OTP+SHIFT+E (Mac) or CTRL+ALT+SHIFT+E (Win) to create a new layer that contains all the other layers flattened into one. Now, go to ‘filter-camera raw filter’ to add some finishing touches to the colours. This can be done to taste. I chose to add a washed out look by using the curves to decrease the contrast. I also used the blue channel in curves to add blue to the shadows and yellow to the highlights. I emphasised this with ‘split toning’ to add more blue and yellow. I also added a vignette, and finally a gradient mask to the bottom of the image to increase the clarity.
The image could be finished here, but I decided to use Nik Collections Color Efex Pro 4 to add a few final filters. I added a touch of ‘pro contrast’ and a ‘glamour glow’ filter. Nik Collection always adds its filters in a new layer, so I was able to lower the opacity of that layer and add a layer mask to remove the effect from the grass.
If you enjoyed this video, please like and subscribe to my YouTube channel for more.
Final Image